
![Background image for How to make an AI Chatbot for Customer Support in 14 minutes [Step-by-step tutorial]](/blog-assets/posts/aiForCS_bg.png)
Whether you’re looking to build an AI Chatbot to increase engagement on your e-commerce website, or you need one because you’re tired of answering the same customer question for the 100th time… You came to the right place.
We’re going to show you how to make an AI Chatbot for your business, based on your own __ data like your website’s content, FAQ, or internal knowledge bases.
The best part is that you’re only going to need two things: the enthusiasm that brought you here and a Quickchat AI account.
Don’t worry, if you don’t have one; you can create it now and start building your own AI Chatbot for free.
Do you prefer a video version to follow along? Here it is:
Hang on, what is an AI Chatbot?
AI Chatbot, or an AI Agent if you will, is a chatbot that uses artificial intelligence to understand context and deliver human-like responses.
You no longer need to spend countless hours creating complex decision trees and designing conversation flows to set up an AI chatbot that will relief your customer support team.
The number of potential use cases of AI chatbots only grows from now on, but in this tutorial, we’ll focus on automating answering your customers’ questions who contact sales or support teams via a live chat.
Or any other apps your customers hang out on — think WhatsApp, Facebook Messenger and more.
The more attention you give to building, using, and teaching your AI Chatbot — the better it will interact with your customers.
Let’s take Quickchat AI for a spin, then:
How to create an AI Chatbot in 7 steps
- Define the basics.
- Train the AI Chatbot based on your data.
- Personalize your AI Chatbot.
- Add more languages.
- Enable the chatbot-to-human handoff.
- Test, test, and test some more.
- Go live!
We’re big fans of teaching by example, so to create an AI Chatbot today, we will use the example of an online Apple product reseller, MacShop, to illustrate each step.
Note that Quickchat’s platform was specifically designed and built for businesses, so while it offers comprehensive customization and control options, it may not be the best fit for fun purposes due to its built-in guardrails and functionalities developed to cater to business needs.
But, if you’re looking for something for professional use, keep reading.
Step 1: Define the basics
Once you sign up for Quickchat AI, you’ll land on the Dashboard that will later help you track your AI Chatbot’s performance and dig for insights.

For now, let’s focus on other tabs. We’ll get back to the Dashboard after you create your own AI Chatbot, deploy it, and gather some data!
So, we first land in the initial settings and begin our journey to build an AI Chatbot by naming it.
This is the name the AI will refer to when asked to introduce itself. So ideally, it should be related to the AI Chatbot’s function, your business, or anything relevant to your customers.
Rather than, for instance, your name — unless of course that’s the vibe you’re going for.
Naming is the hard part, but let’s settle for…. A Helpful Macintosh?
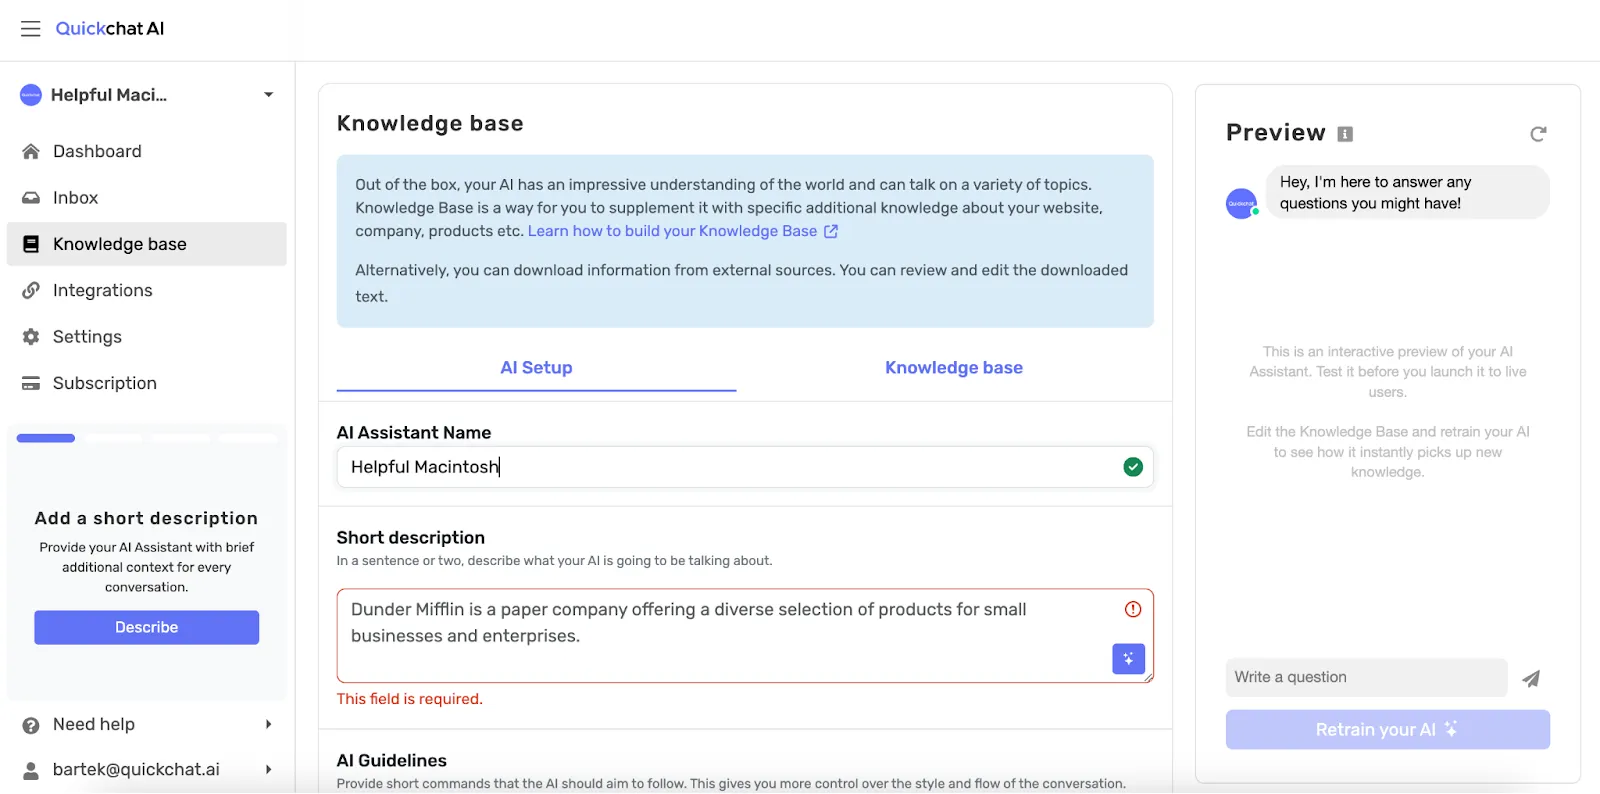
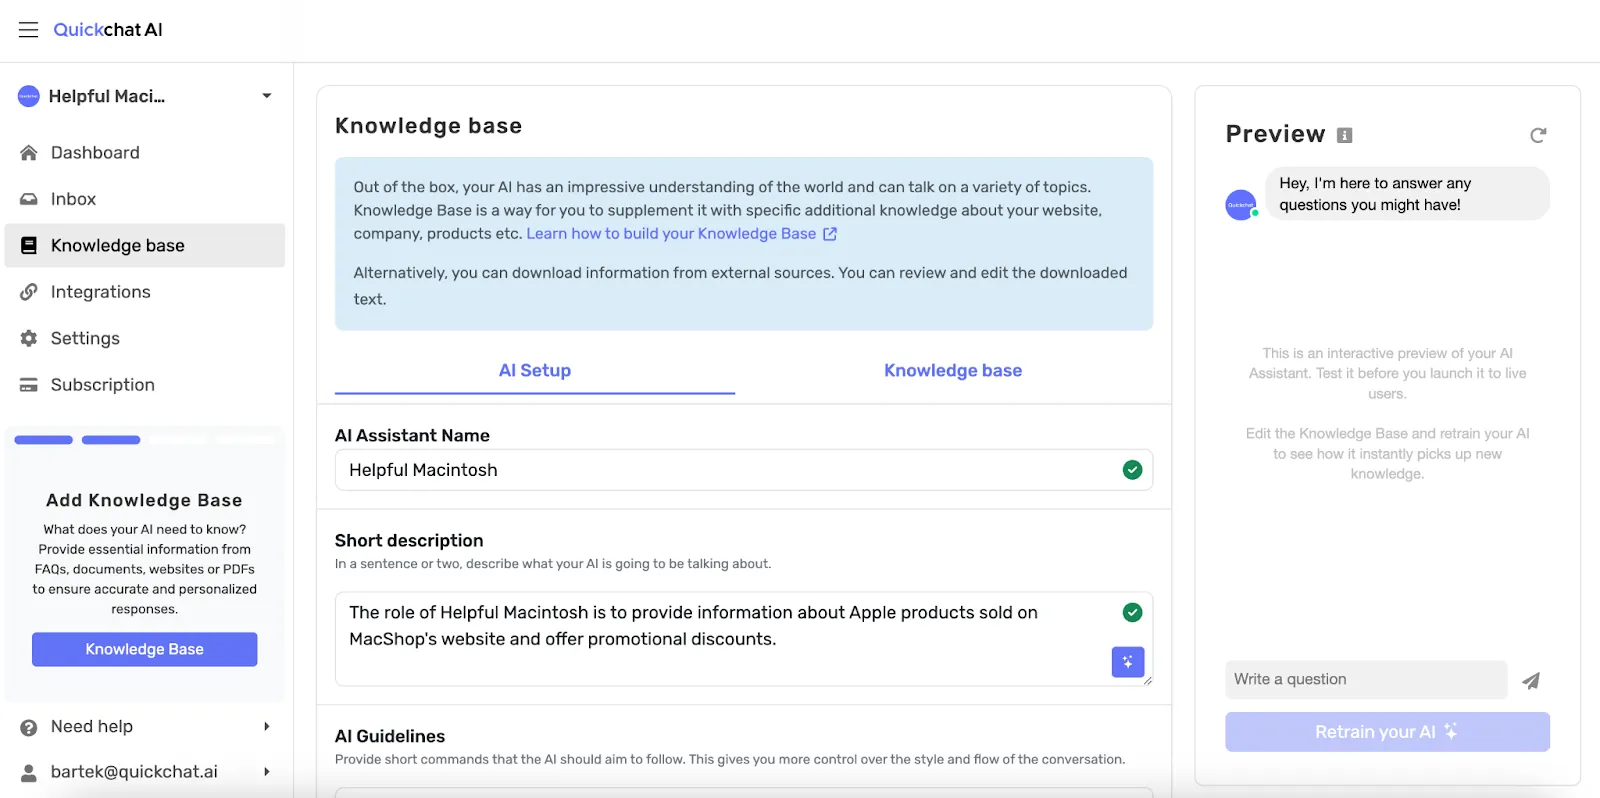
Then comes the description. Think of it as a very concise “job description” for the AI.
In the case of MacShop, the AI Chatbot’s role is to provide information on Apple products and offer promotional discounts.
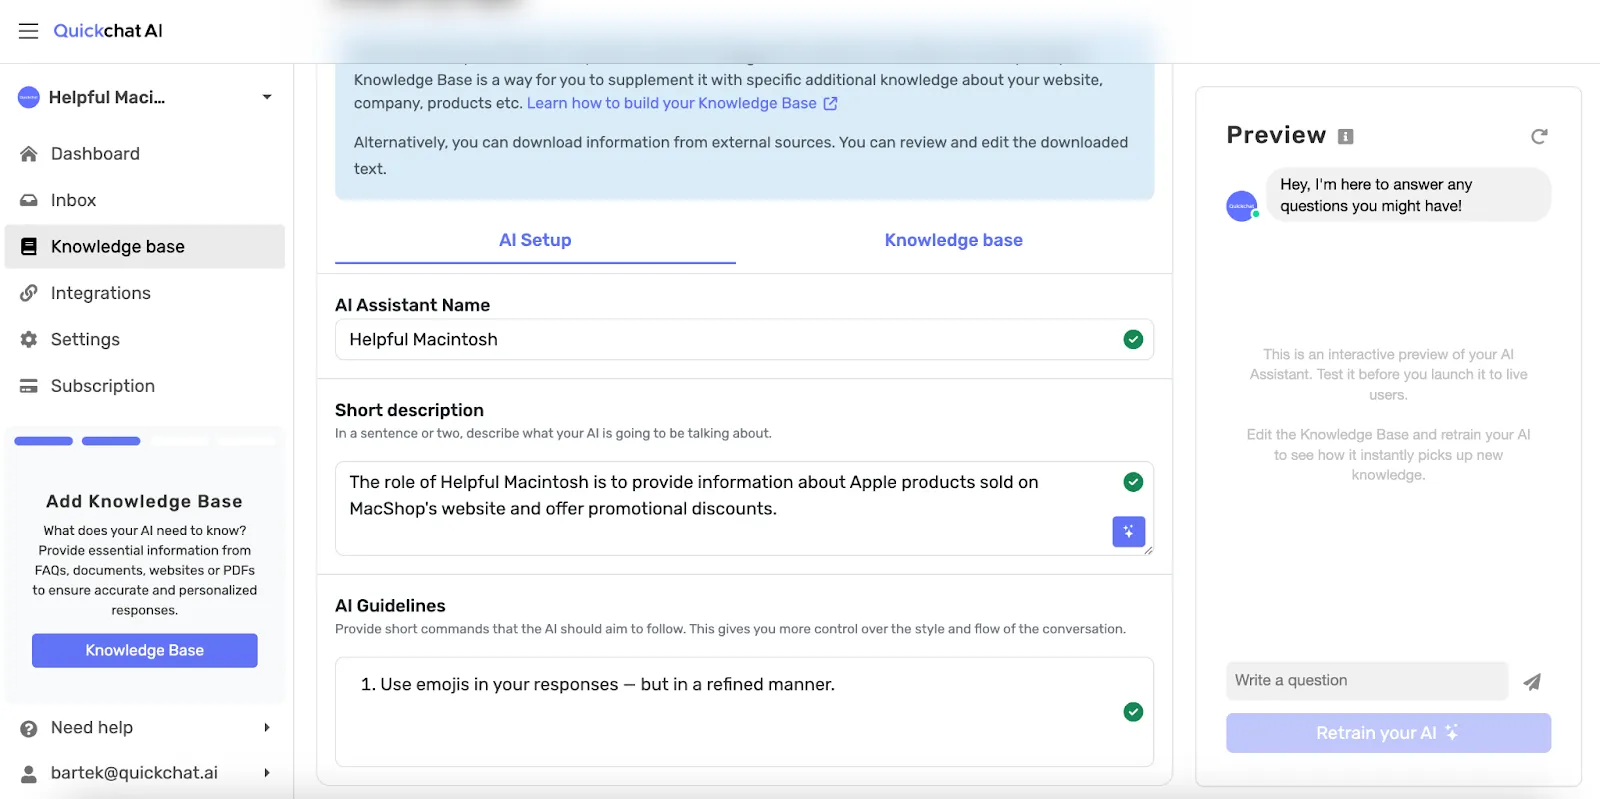
Now for the fun part: AI Guidelines , that let us specify particular behaviors we want the AI Chatbot to follow, along with the behaviors that we don’t want to see. Ever. (No worries, we’ll get to that part later).
In the case of the Helpful Mac, we want it to use emojis — but in a refined manner.
Nice work! So far, we have named your AI Chatbot and defined what it will be responsible for.
Now it’s time to give it some knowledge by plugging it into your data sources, so it can actually assist your customers.
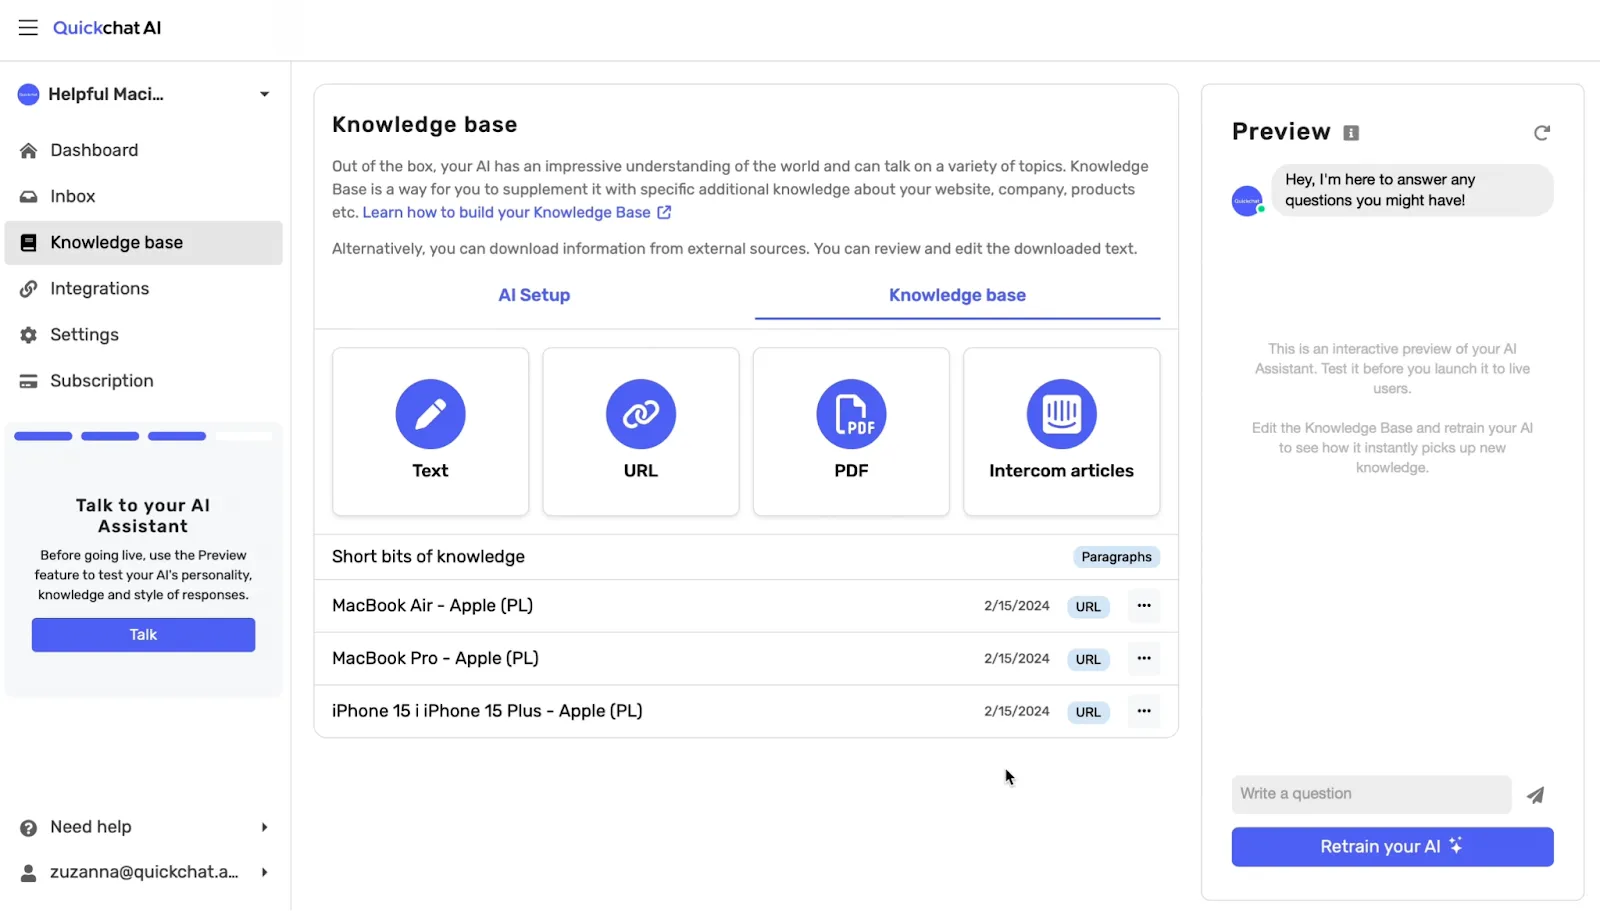
Step 2: Train the AI Chatbot based on your data
The Knowledge Base tab is responsible for just that. It’s where we can upload, edit, and validate text to supplement AI’s understanding of your company, products, or project.
After all… What would a Helpful Mac be without knowledge of the newest Apple products straight out of MacShop’s website?
We don’t need to add all this information manually — we can use theURL Import option to download all your product descriptions from the website straight to the Knowledge Base.
Thus, we upload URLs to MacBook Pro, MacBook Air, and iPhone 15, to download only the information on these products.
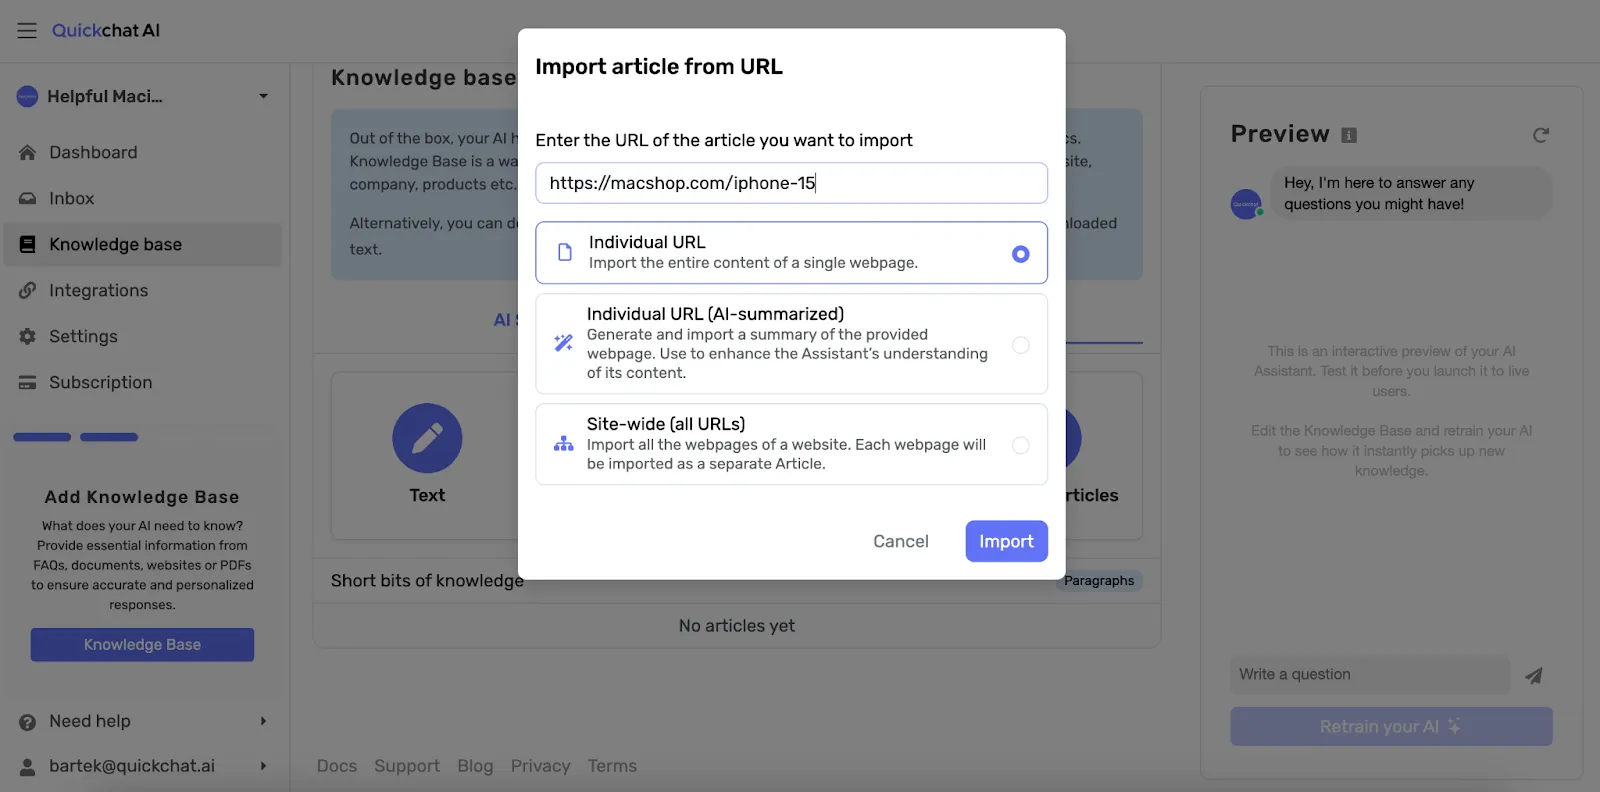
However, if you’re a large e-commerce store looking to import all your product descriptions, the Site-wide option would suit us better.
Let’s quickly test if it works…
And it does! We now have an AI Chatbot called Helpful Mac that knows all the products on your website. This might well be it and we could conclude the tutorial here, but…
Helpful Macintosh is pretty basic at this point. We want the chatbot interactions with your clients to be memorable, so it would be great if the AI Chatbot had some personality.
Let’s get to it!
Step 3: Personalize your AI Chatbot
In the Settings tab, we first have the AI Personality. In this case, we’d want Helpful Mac not to take life so seriously and be humorous.
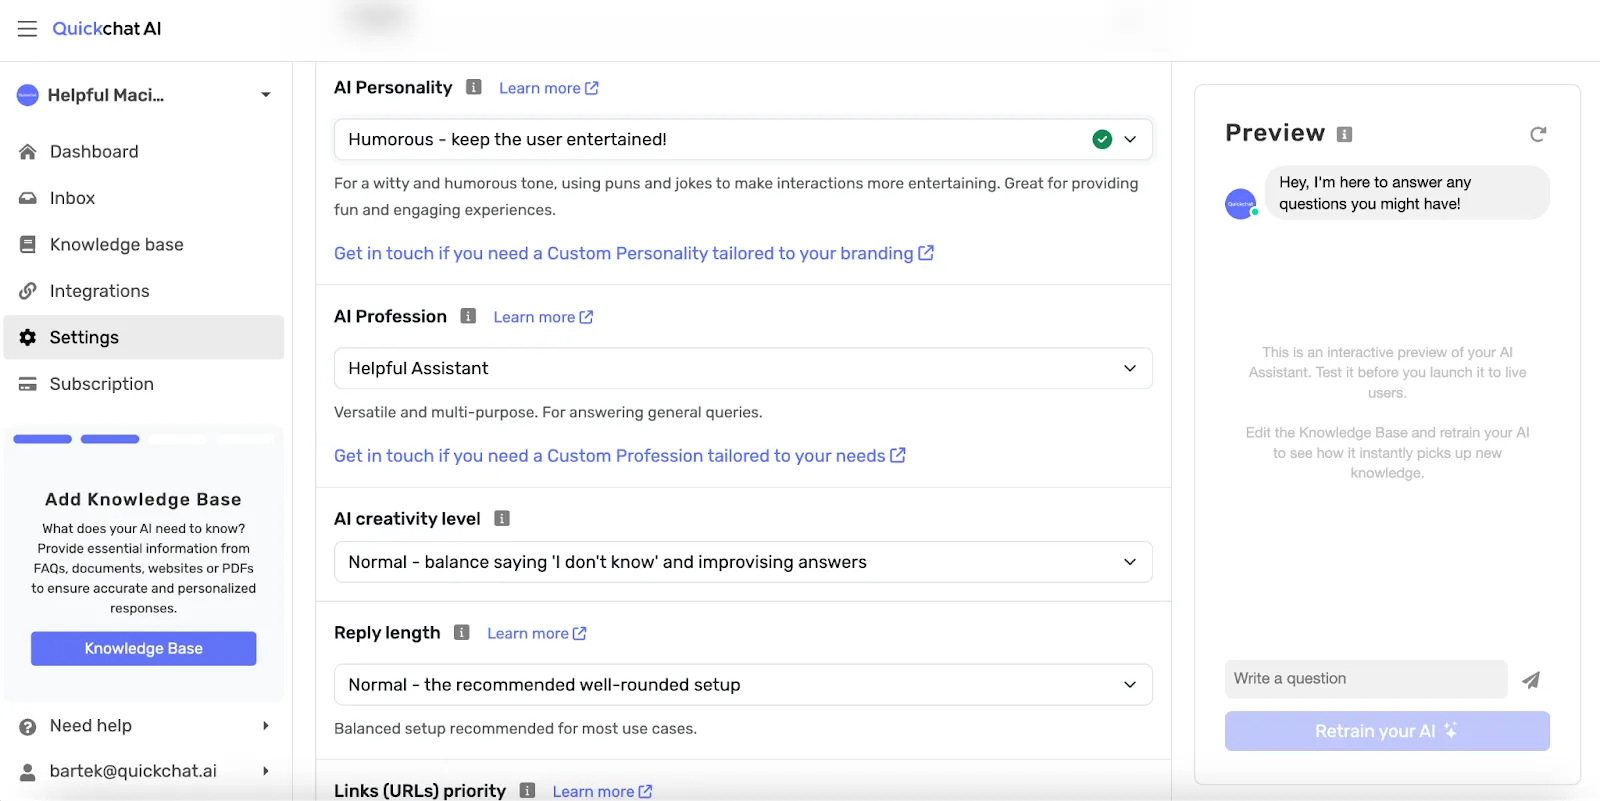
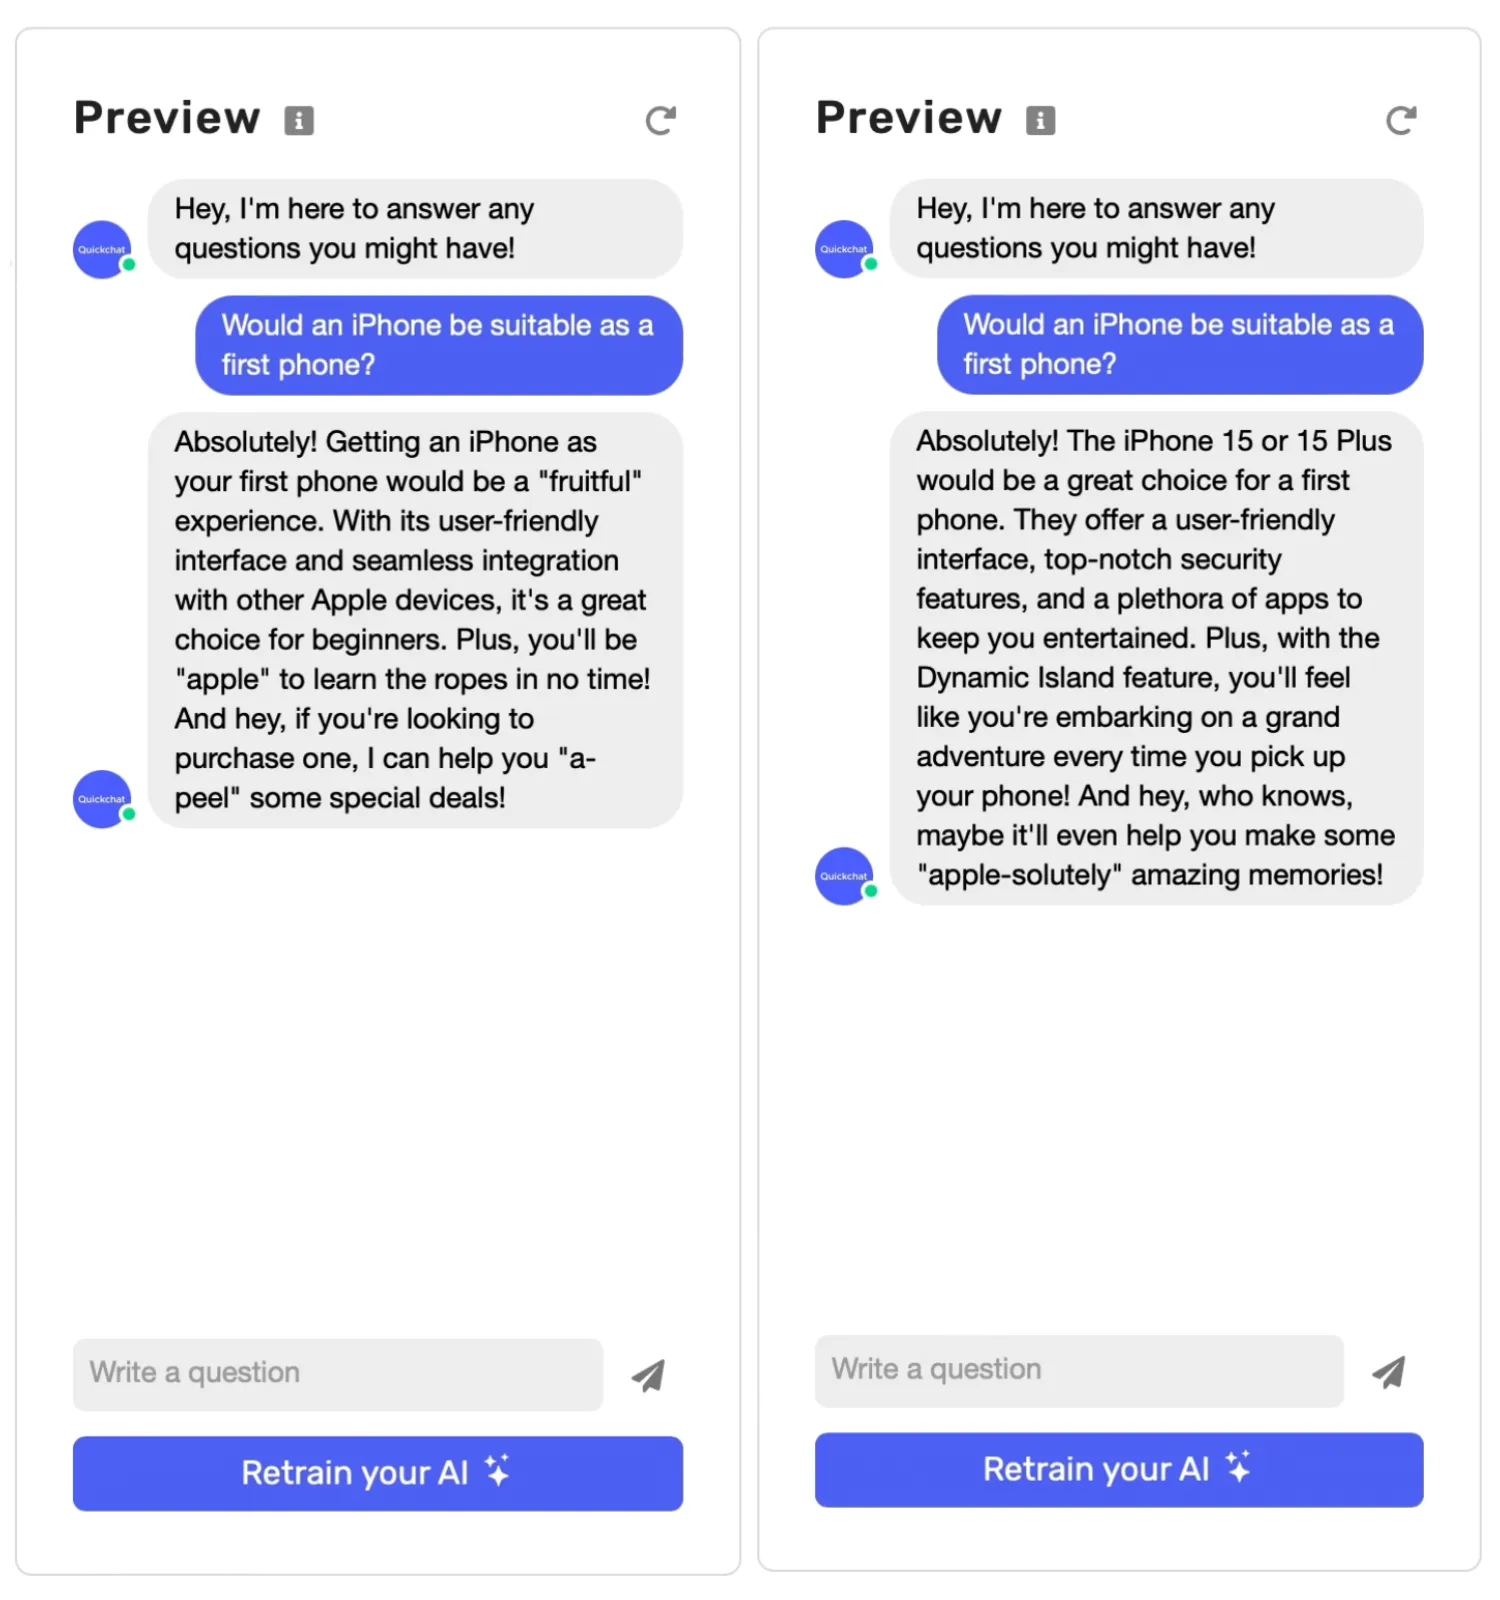
Next, there’s an******AI Profession**. We can choose from four different options here. Helpful Macintosh is an AI Chatbot for an e-commerce store, so a Shopping Assistant seems fitting.
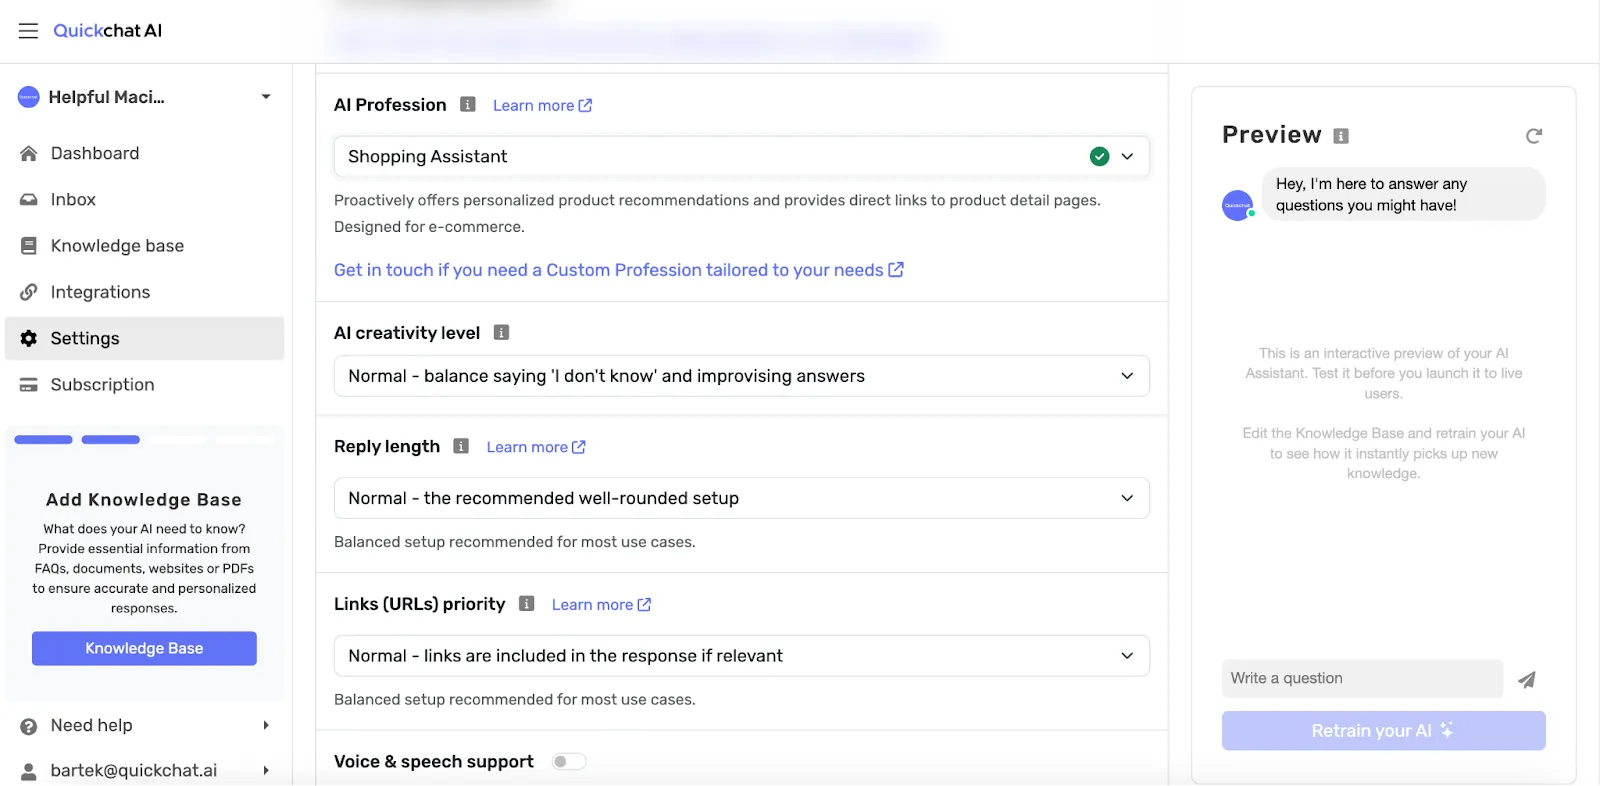
Let’s see how the response changes from a Helpful Assistant (“Helpful Assistant” Personality on the left, “Shopping Assistant” on the right)
We also have more settings to specify, such as:
- AI creativity ,**** which reflects how much the AI Agent should improvise when asked a question that is on the subject, but for which there is no answer in the Knowledge Base,
- Reply length ,**** which controls if the reply should be short, medium, or long, and,
- Links (URLs) priority , which specifies whether the URLs (for instance to products) will be added wherever appropriate or maybe prioritized over other information.
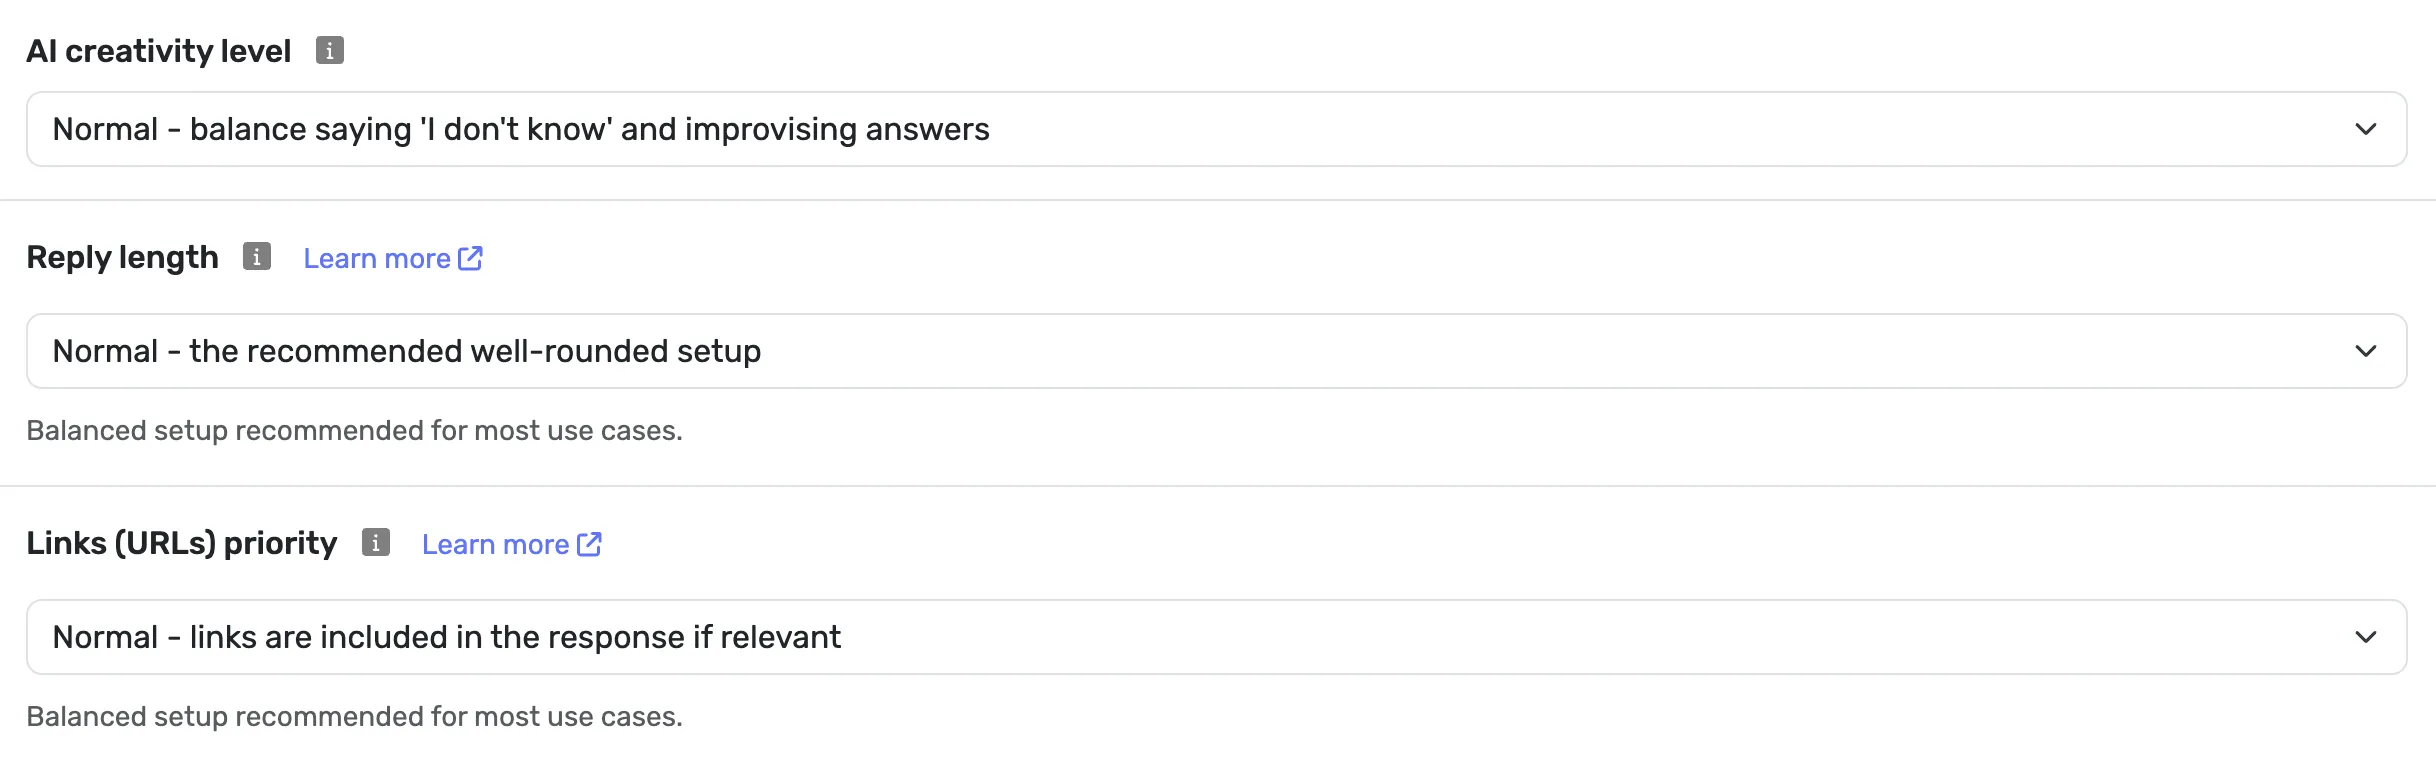
If you’re unsure yet, you can totally leave the default settings for now.
Whew! Helpful Mac is now definitely camera-ready! But wait… MacShop has an international customer base, covering USA and Latin America, so building an AI Chatbot in Spanish could be useful, too.
Step 4: Add more languages
Let’s go to the Language settings and add support in Spanish, then.
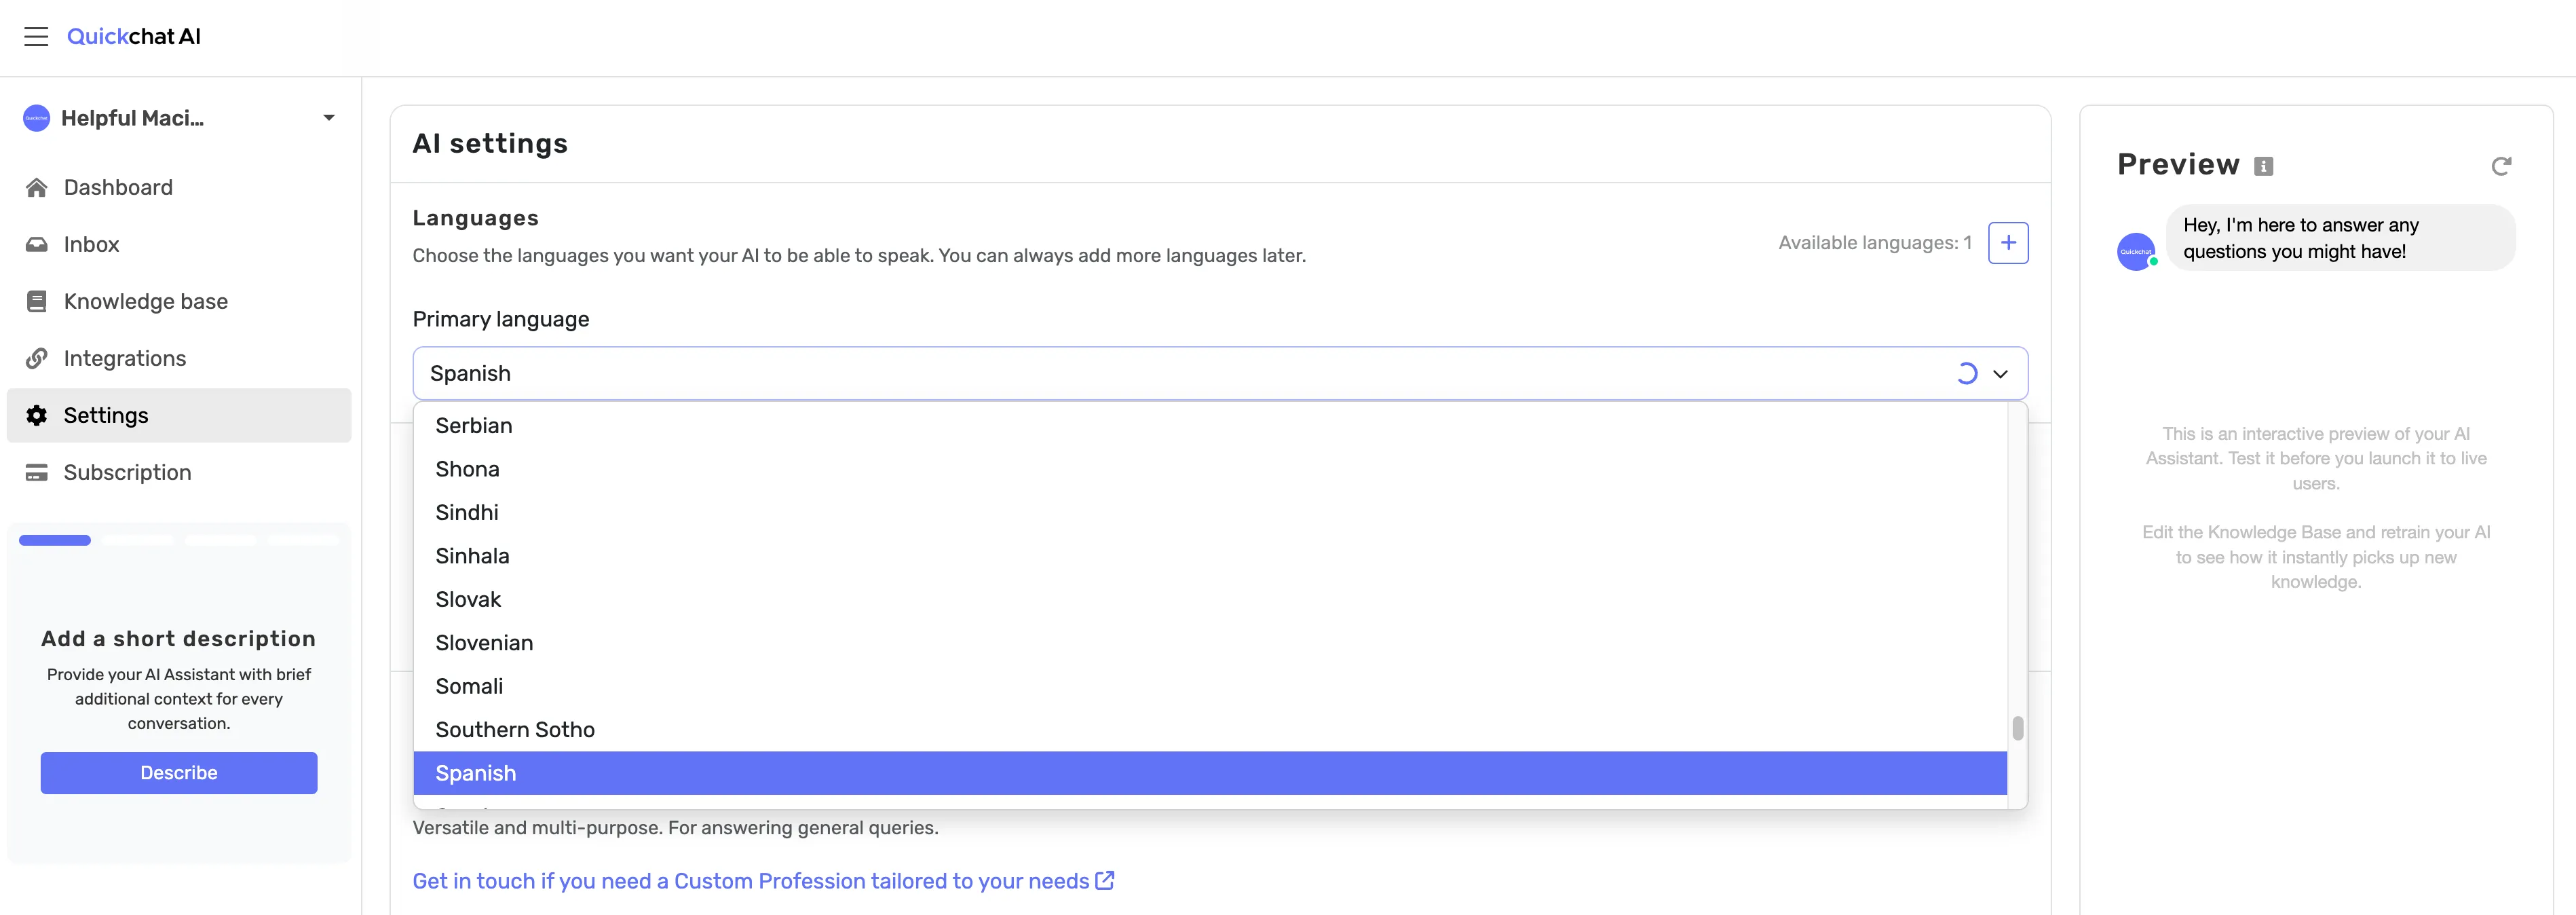
Muy bien! Now, when we begin a conversation in Spanish, helpful Macintosh will reply in Spanish. So… Qué es MacShop?
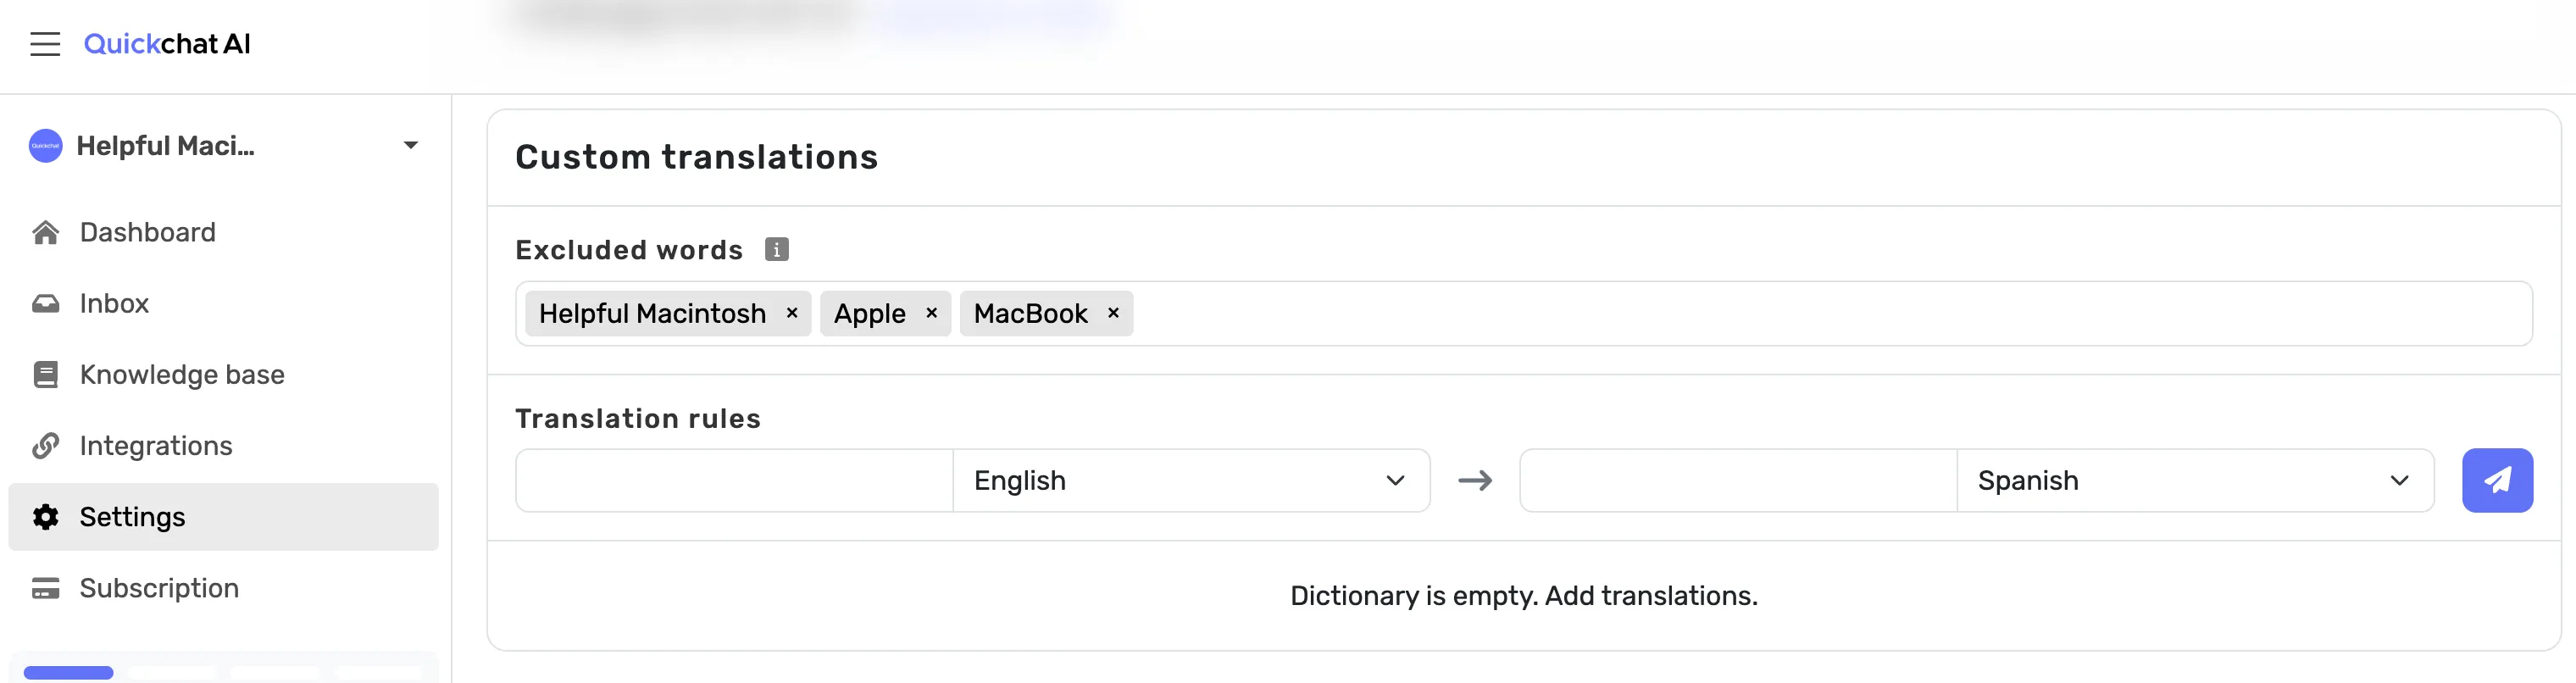
There’s one more thing to note here: Large Language Model translations are sometimes incorrect, especially when translating words with different meanings in different contexts — such as brand names or taglines.
We can put them in the******Custom Translations** section to be on the safe side.
Step 5: Enable the chatbot-to-human handoff
Right now, Helpful Mac relieves MacShop of a ton of heavy lifting regarding customer service.
But, for users who want to be connected to a human, Human Handoff**** is a feature that automatically detects when the conversation should be handed off to a human agent.
This may include situations beyond your AI Chatbot’s capabilities, such as a refund for a purchased Apple product or checking the delivery status of their new MacBook. Luckily, when built properly, our AI Chatbot can detect this intent and connect with your Customer Service members.
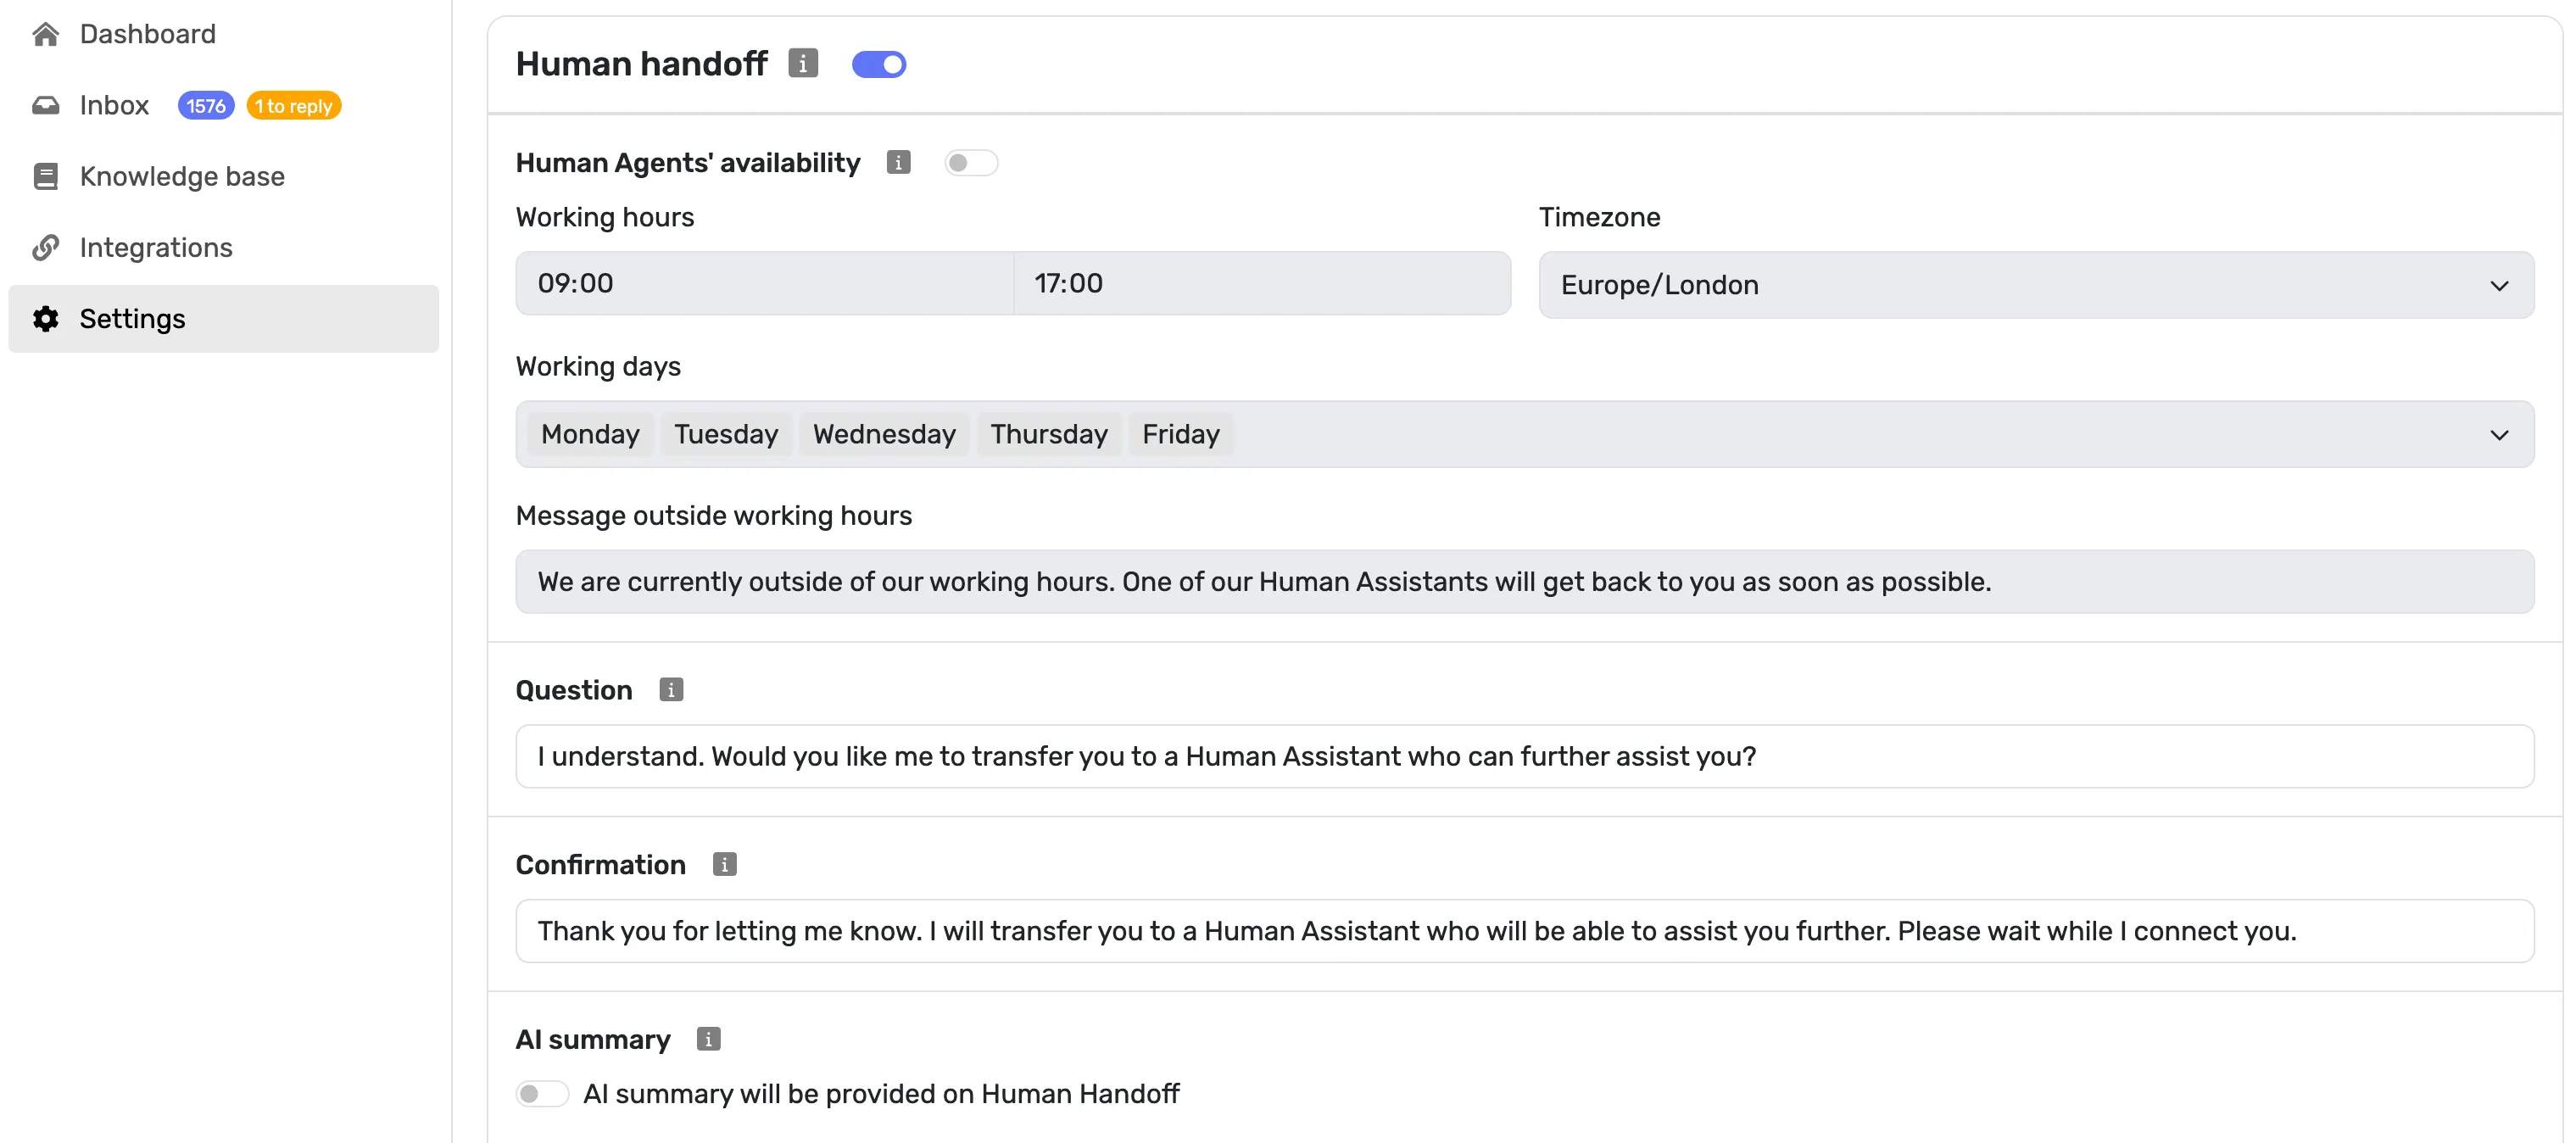
There are numerous ways to customize Human Handoff to your exact needs.
We won’t go into each option now, but the good news is we have a whole video devoted to this cool feature only, so make sure to watch it next, if you want to dive deep and get the most out of this feature!
Step 6: Test, test, and test some more
The last step before launching the AI Chatbot is to test it back and forth before giving it to your users to ensure that it replies just in the way you’d like it to.
Ask all the potential questions your customers may ask in the Preview window — and see how it responds based on the information from the Knowledge Base!
Ah! We almost forgot.
MacShop has an early spring discount code SPRINGMAC10, so we should add it to the AI Guidelines.

Alright, so we talked a lot with our AI Chatbot in the Preview and tried different questions that our customers ask every day.
The verdict?
The answers were very relevant, accurate, and on-brand. We’re perfectly satisfied with the quality of the responses — the AI Chatbot even used emojis as requested!
Step 7: Go live!
Now it’s time to go live with it and put it into places where our customers hang out. As you can see in the Integrations section, we have many apps that we can integrate with, but we want to have it on the website, so we’ll use the embed option to put it there.
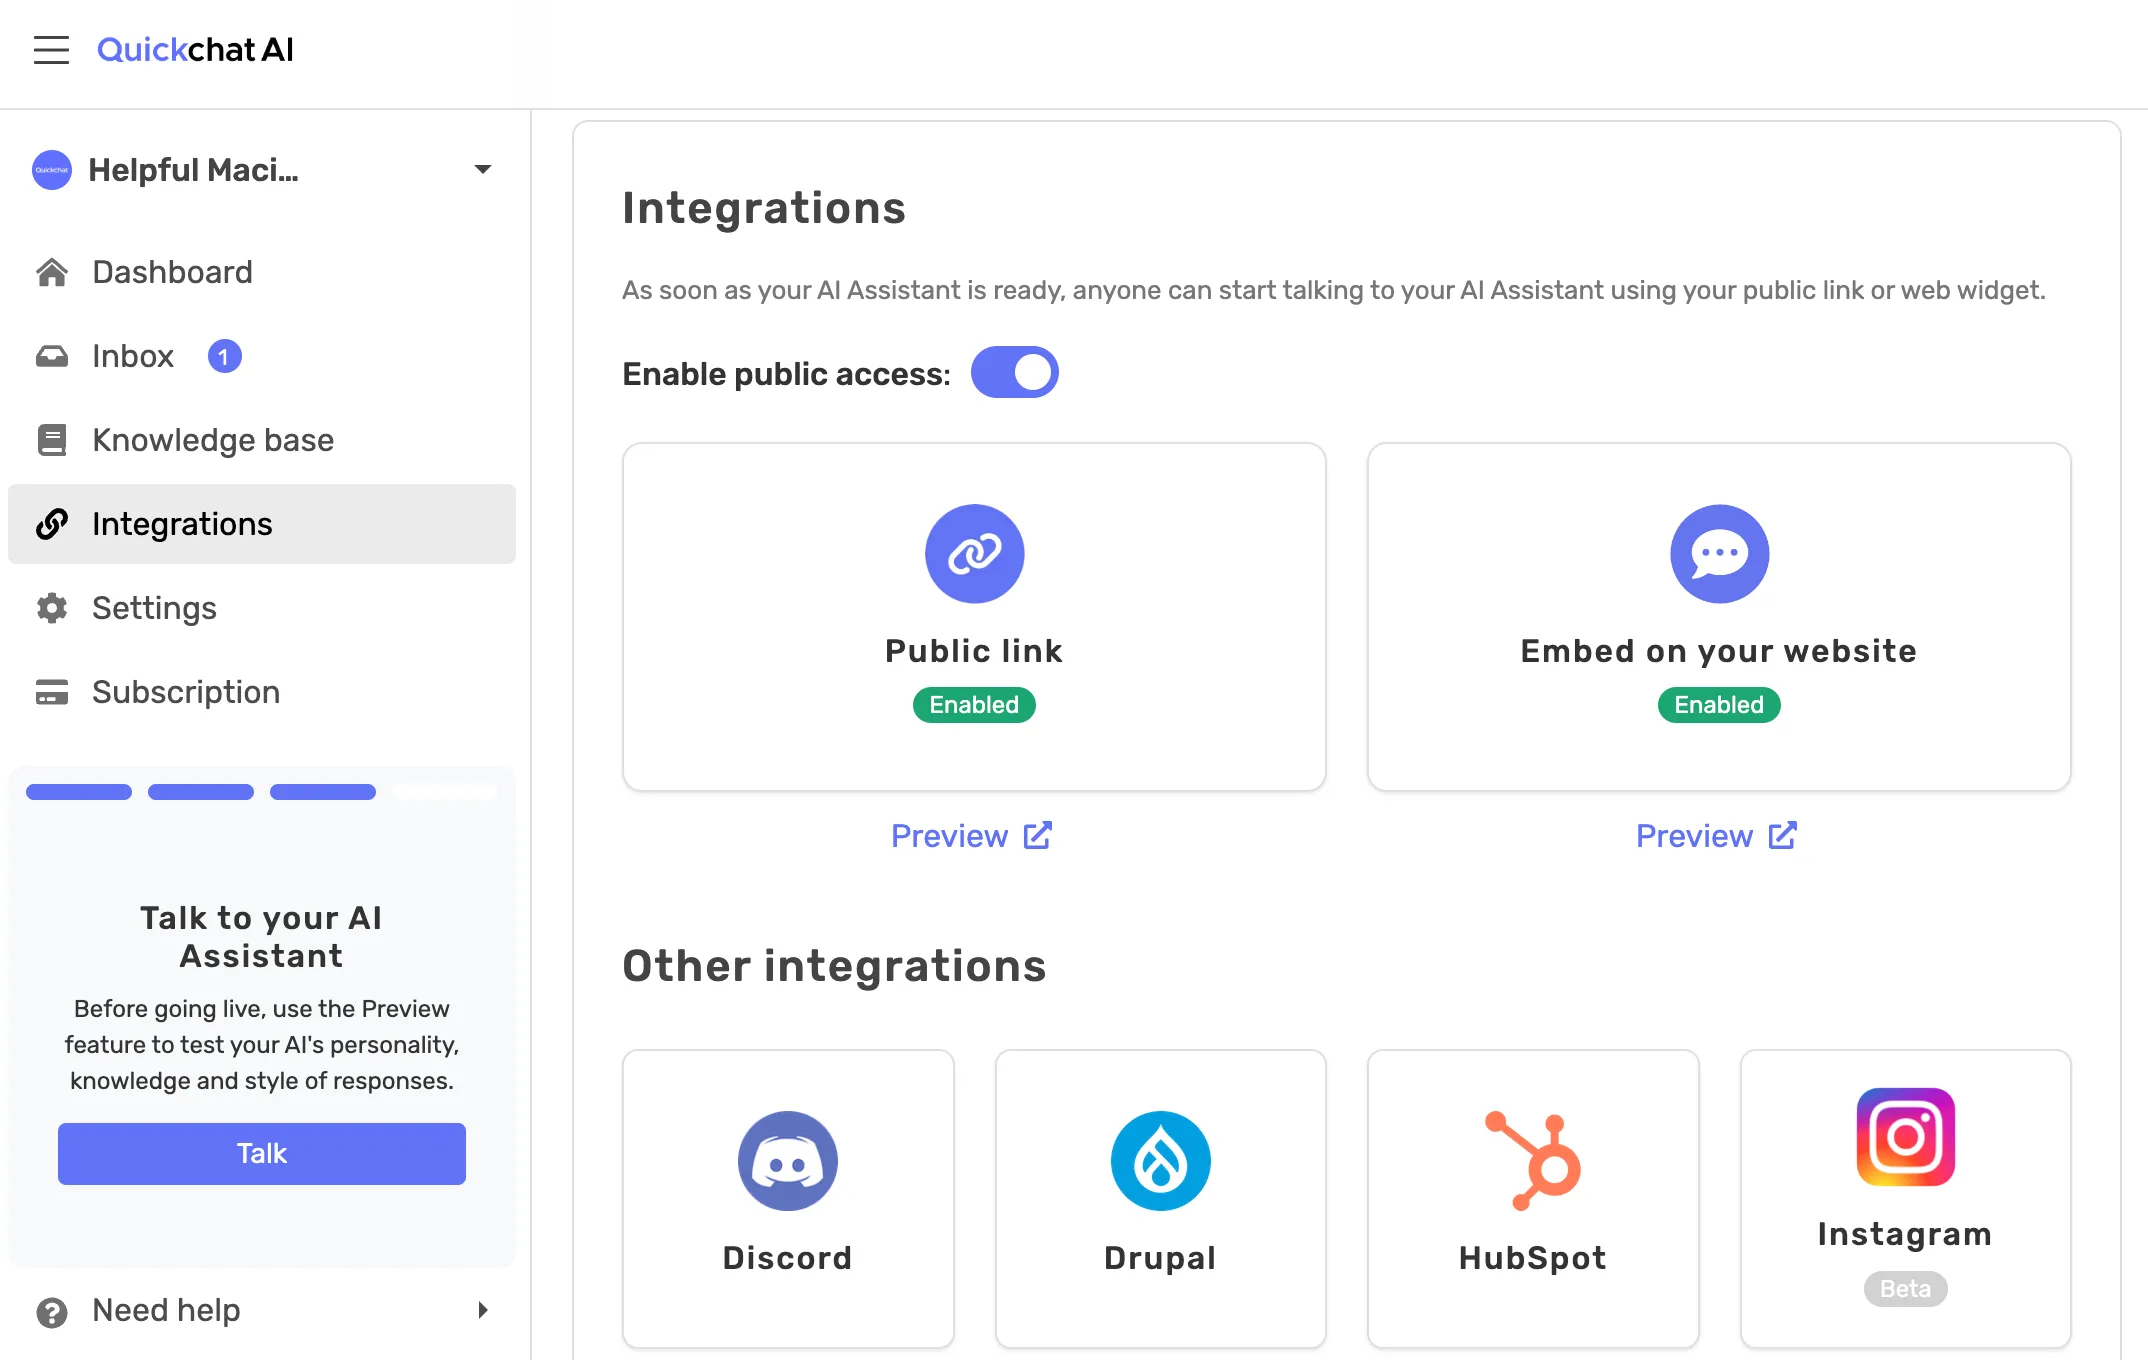
Make sure to switch on “Enable public access” before clicking “Embed on your website” button.
Let’s copy the code from there and then paste it into the website’s code.
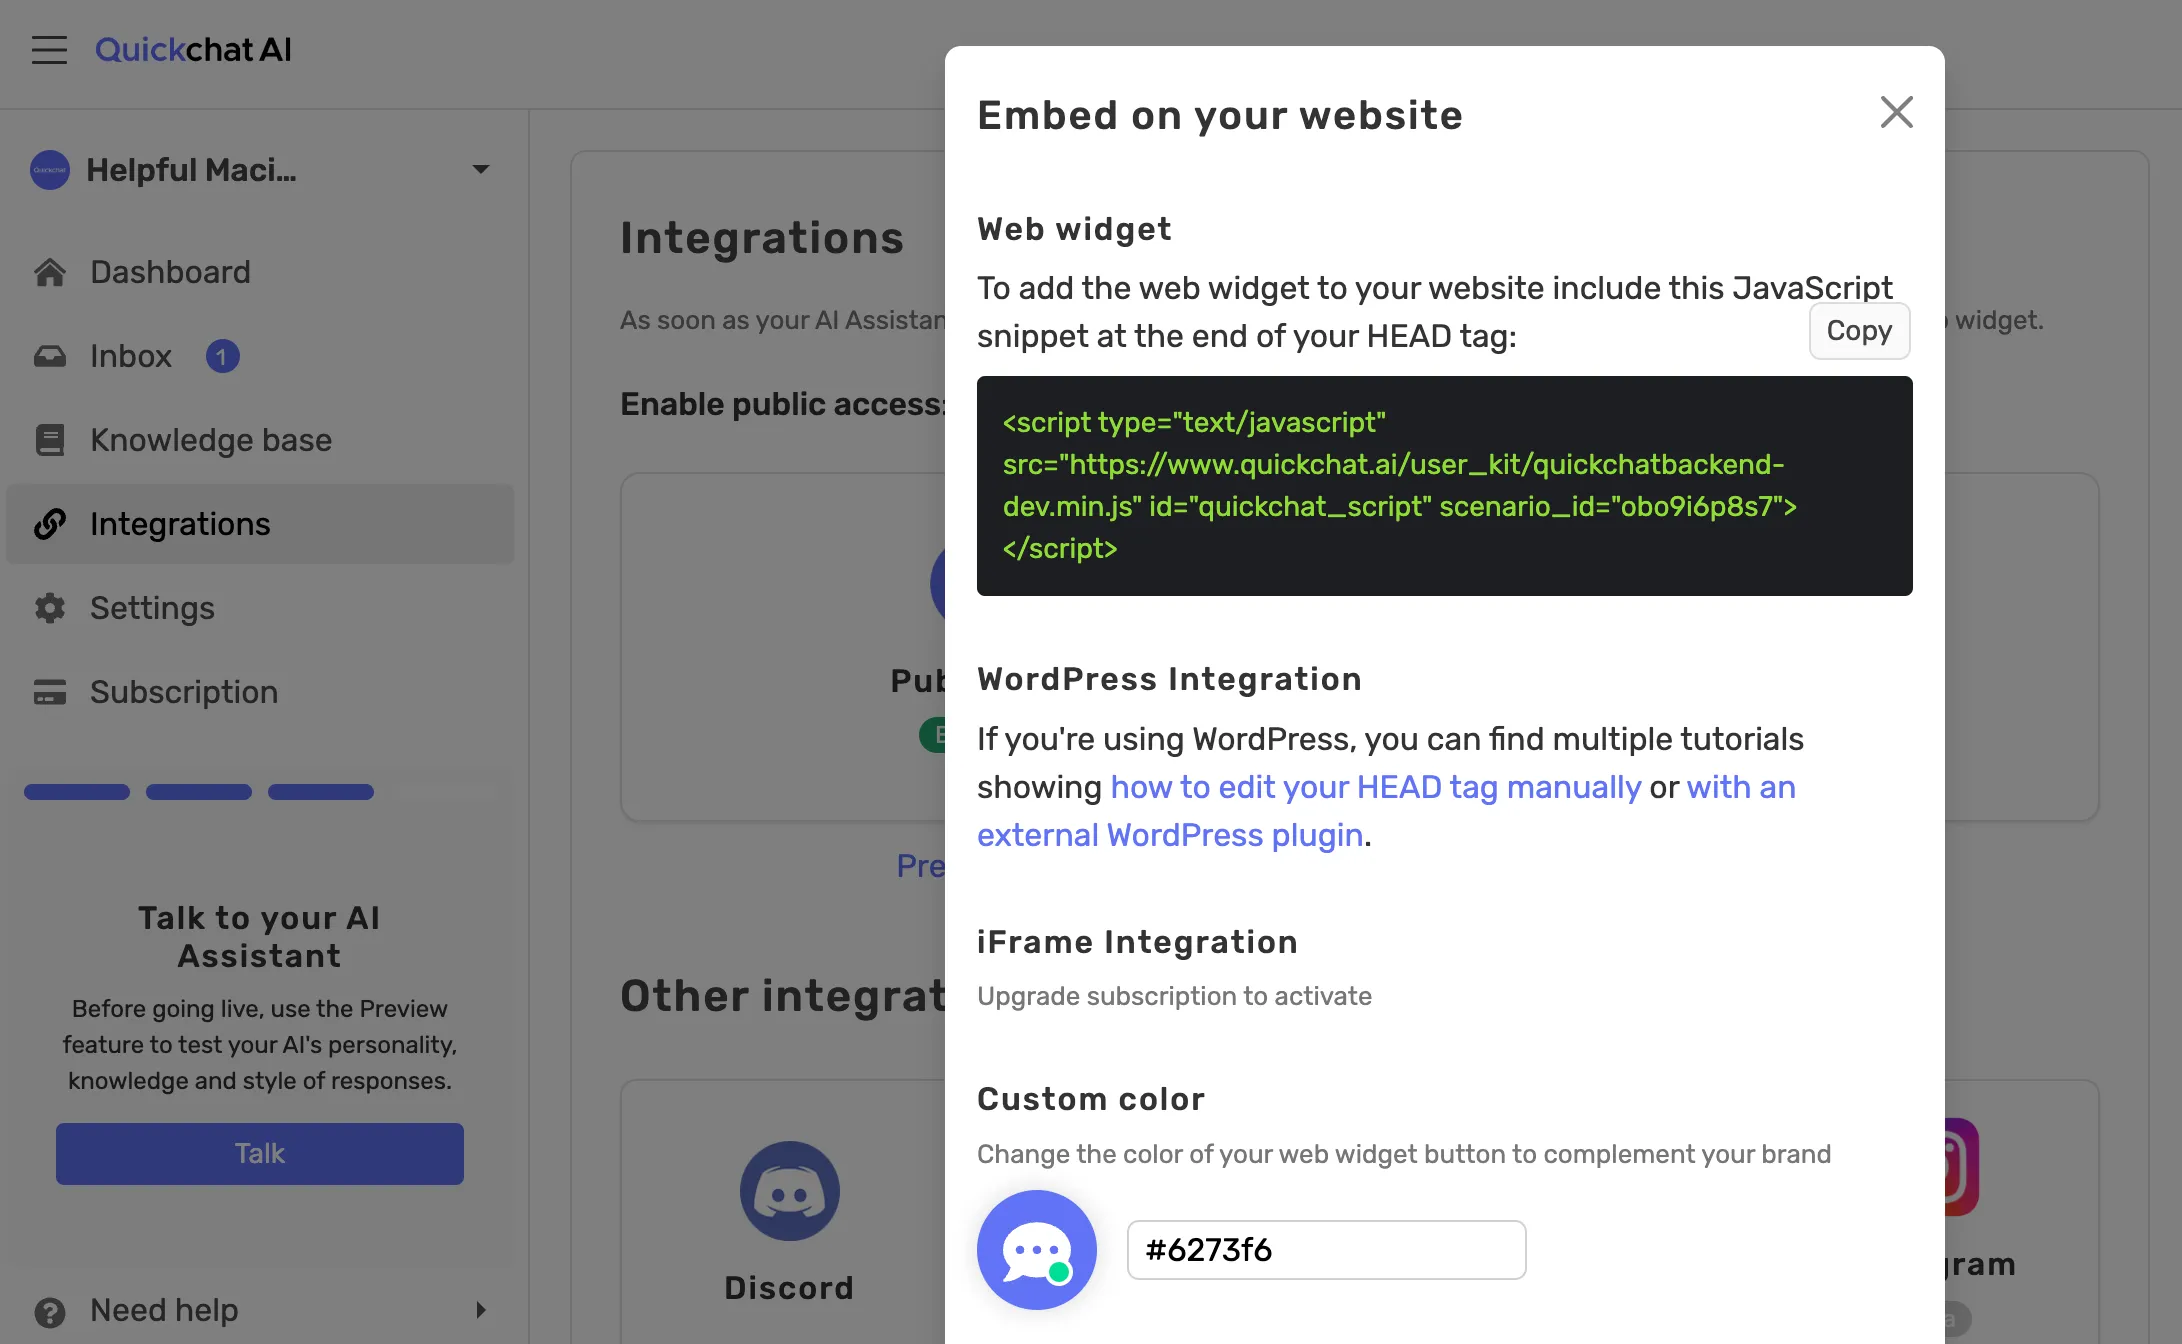
We won’t show that part, because it will look a bit different for everyone, depending on the CMS (Content Management System) you use.
But no worries! It’s pretty straightforward and don’t require any technical knowledge. You’ll easily find tutorials online or — if you’re still unsure — ask your IT team for guidance.
Once you’re at it, remember to customize the colors and the avatar of the widget, so it matches your website’s look and brand.
Voila!
Check out Quickchat’s widget in the bottom right corner of your website.
Ready to create your own AI Chatbot?
That’s it. We have successfully deployed a customized AI Chatbot that can serve your clients and give some relief to your team!
Oh, and once the AI Agent has gathered data from its initial interactions with customers, your dashboard will be filled with all this information. Be sure to visit the dashboard to get a clear overview of its performance.
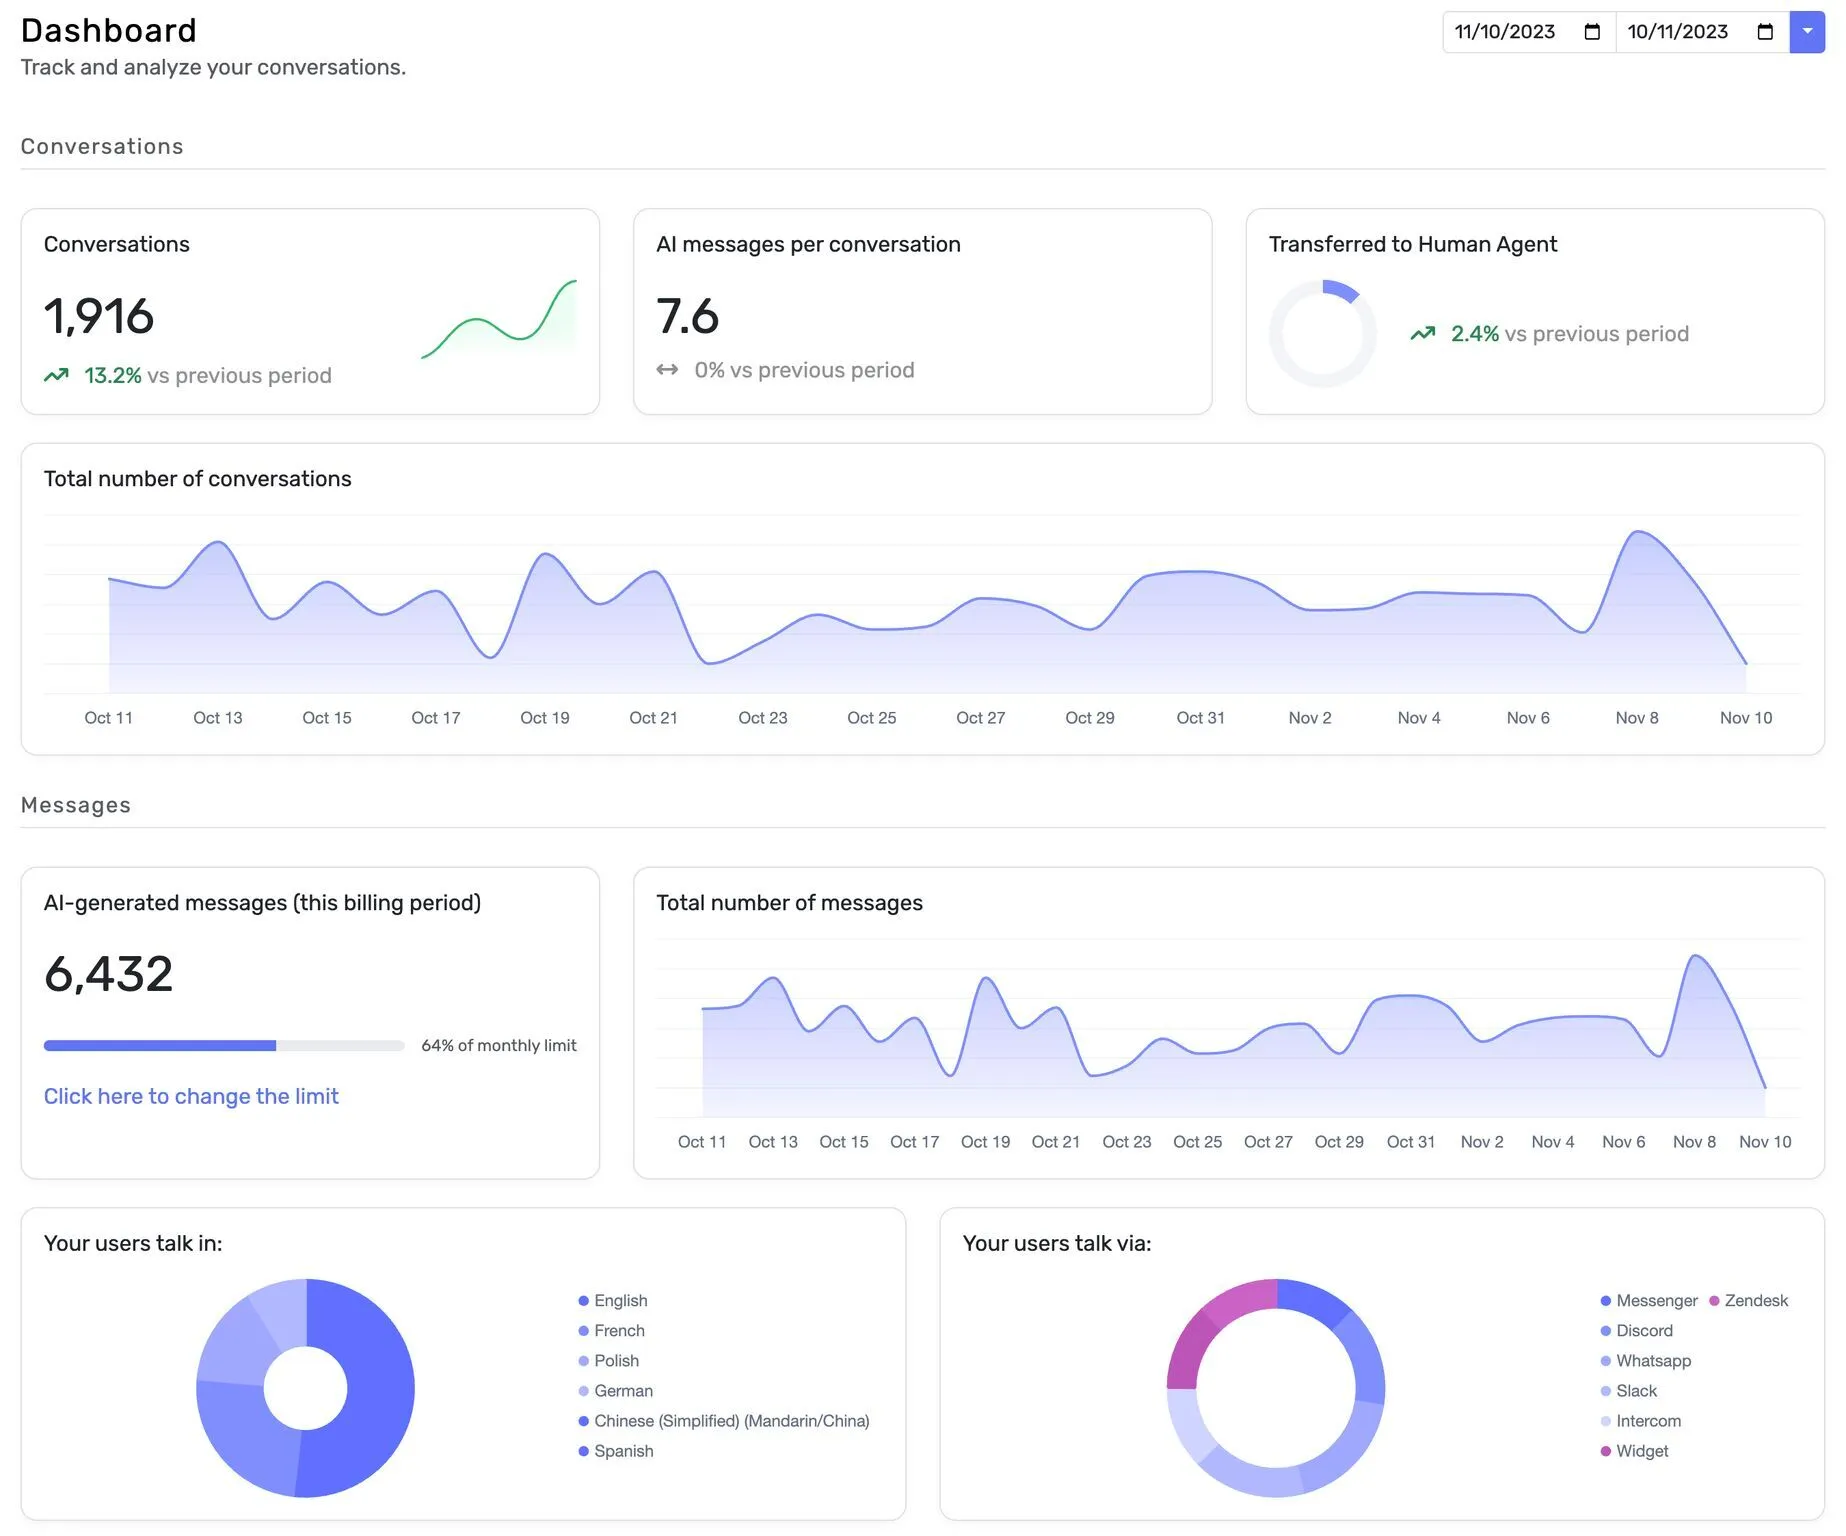
You can track trends and usage, as well as obtain detailed information about your customers who have chatted with the AI Agent, including languages and various breakdowns.
Go ahead and start building your own AI Chatbot for free. Design, tweak, and test it until it aligns perfectly with your business objectives and requirements!
Plus, if you’re looking for conversational AI platforms for your business, check out our checklist of 6 unobvious things you need to consider before choosing the best option.